
Looking to remove, drain or replace your central heating radiators? You're in the right place. Whether you’re upgrading your home heating system, or just re-decorating, removing a radiator is an easy task that requires minimal DIY experience. With our simple step-by-step guide, you’ll have everything you need to accomplish it yourself – no costly callouts required. Plus, if you’re looking to make room for a wall mounted electric radiator, this guide has you covered on that front too! So, let’s get started.

What you’ll need to remove a radiator
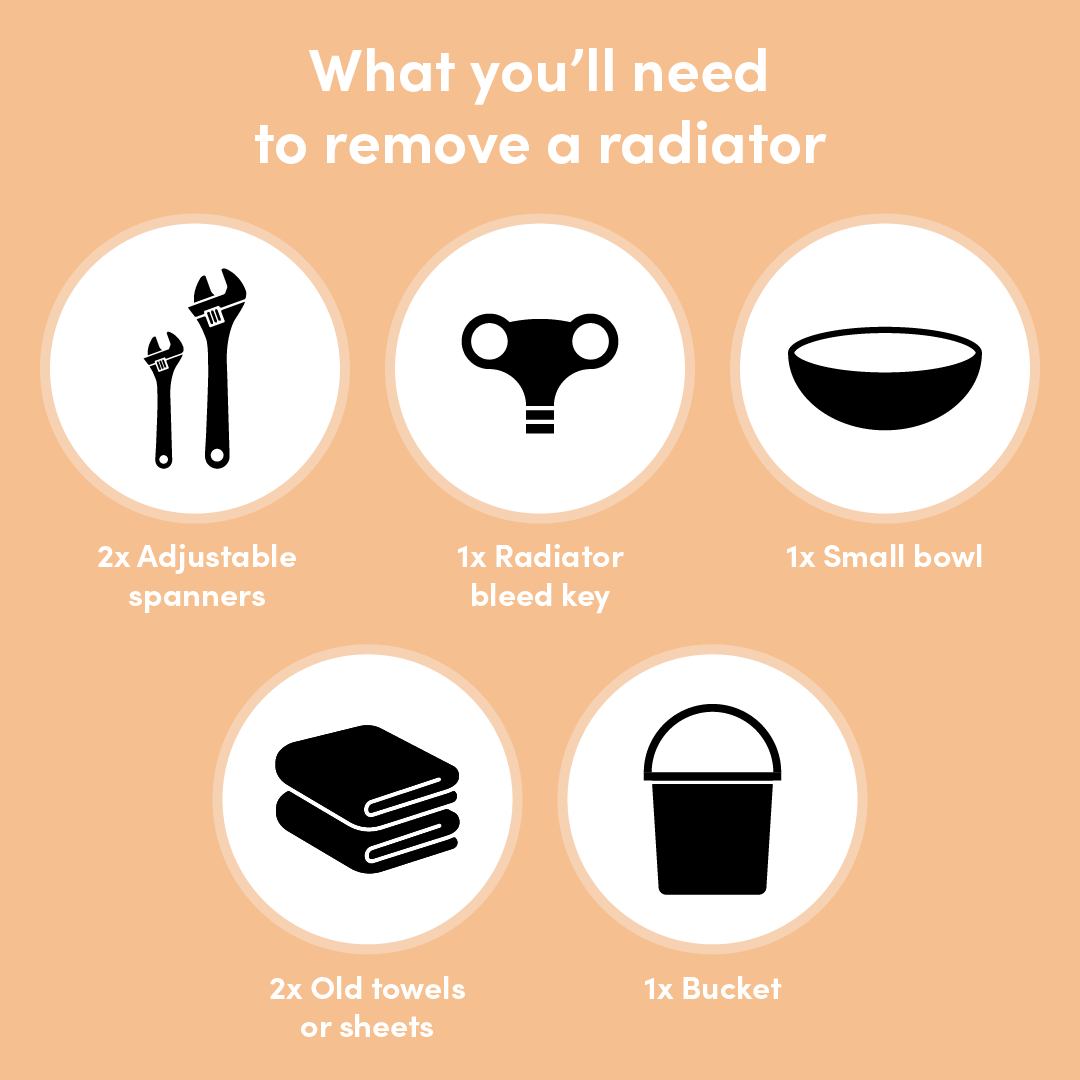
Having the right tools at your disposal is important if you want the process to go smoothly. Here’s a breakdown of the essential tools and materials you’ll need for a successful radiator removal – chances are you already have them lying around your home, so it shouldn’t be too difficult to acquire them.
- 2x Adjustable spanners
- 1x Radiator bleed key
- 1x Small bowl
- 2x Old towels or sheets
- 1x Bucket
Before you start: understanding the components of a radiator
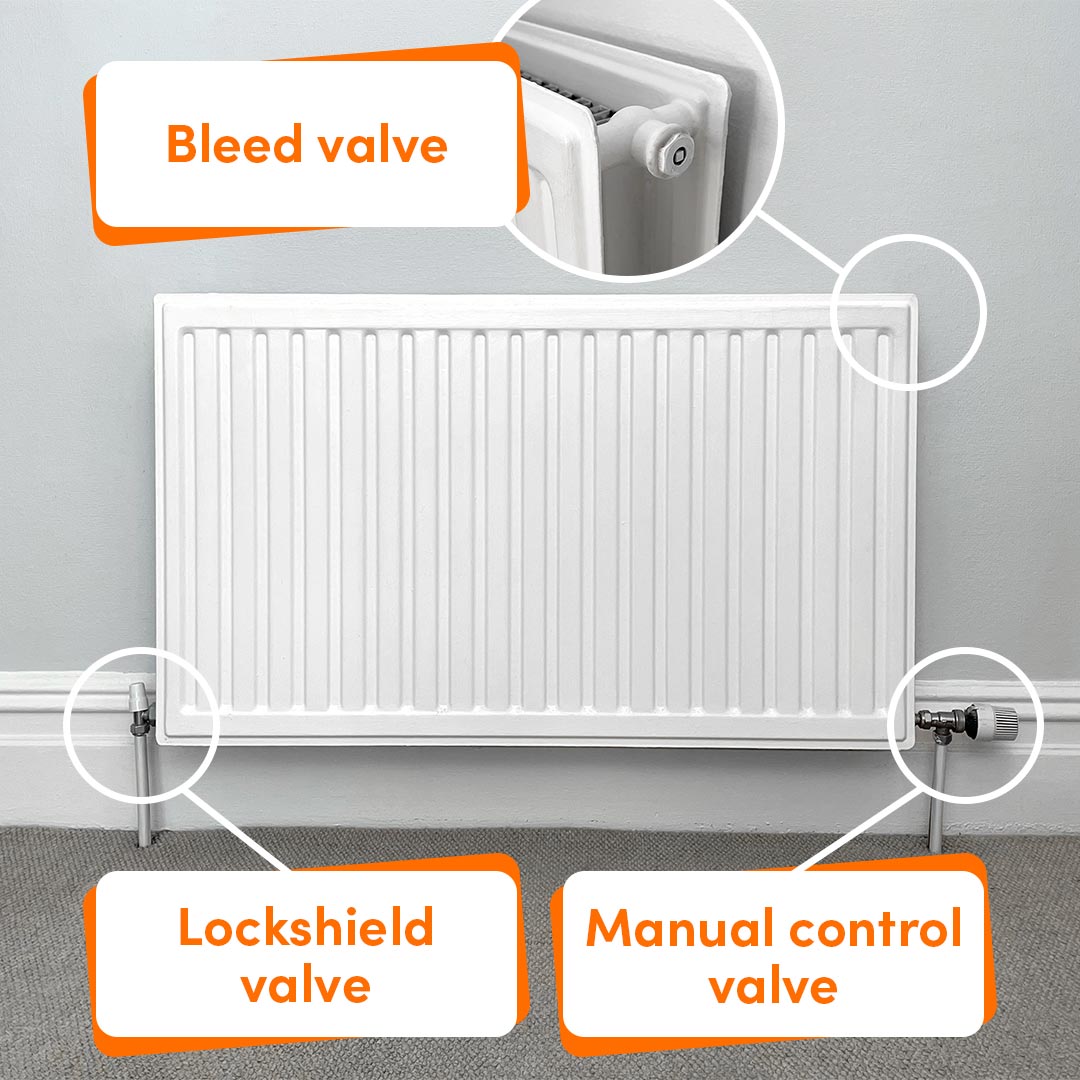
Before you begin to remove the radiator, make sure you understand its components. The three important parts to note are the bleed valve, the manual control valve and the lockshield valve. They each have their own function:
- The bleed valve releases trapped air from within the radiator.
- The manual control valve controls the radiator's temperature.
- The lockshield valve is used when balancing or adjusting the radiator valves to ensure all the radiators heat up at the same rate. It's called a lockshield because once it's been adjusted, it's shielded by a removable plastic cap to prevent it from being accidentally altered.

Removing the radiator: a step-by-step guide
Tools and equipment assembled? Components checked? Radiator off and completely cool? Then you’re ready to go. Please note that depending on your heating system and radiator, the following steps may vary. If you need further guidance, consult a professional plumber to ensure a safe removal process:
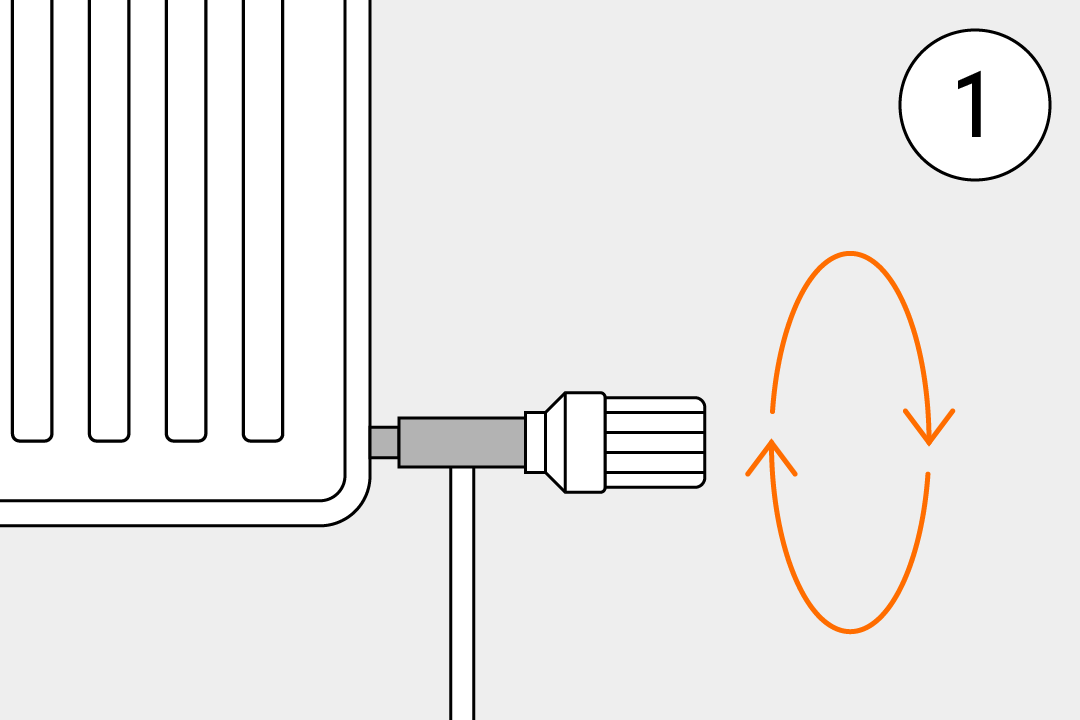
1. Close the manual control valve
- Locate the manual control valve at the bottom of the radiator.
- Using your hand, turn the manual control valve clockwise until it’s fully closed.

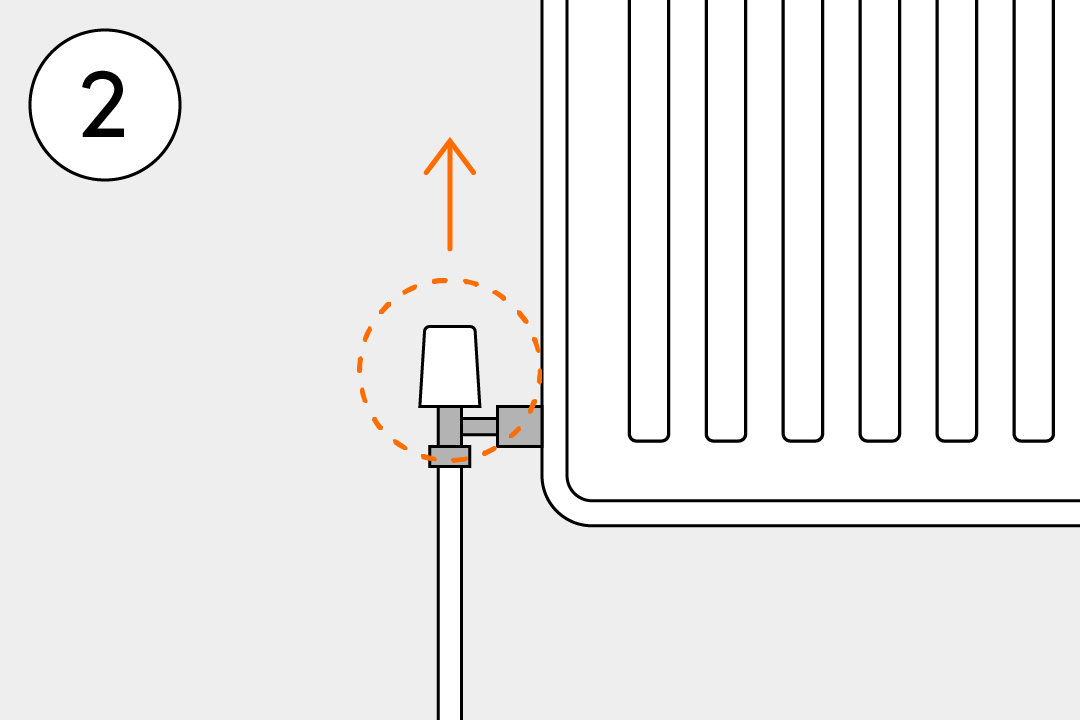
2. Remove the lockshield valve’s plastic cup
- Locate the lockshield valve on the opposite side of the radiator.
- Gently remove the plastic cup covering the lockshield valve.

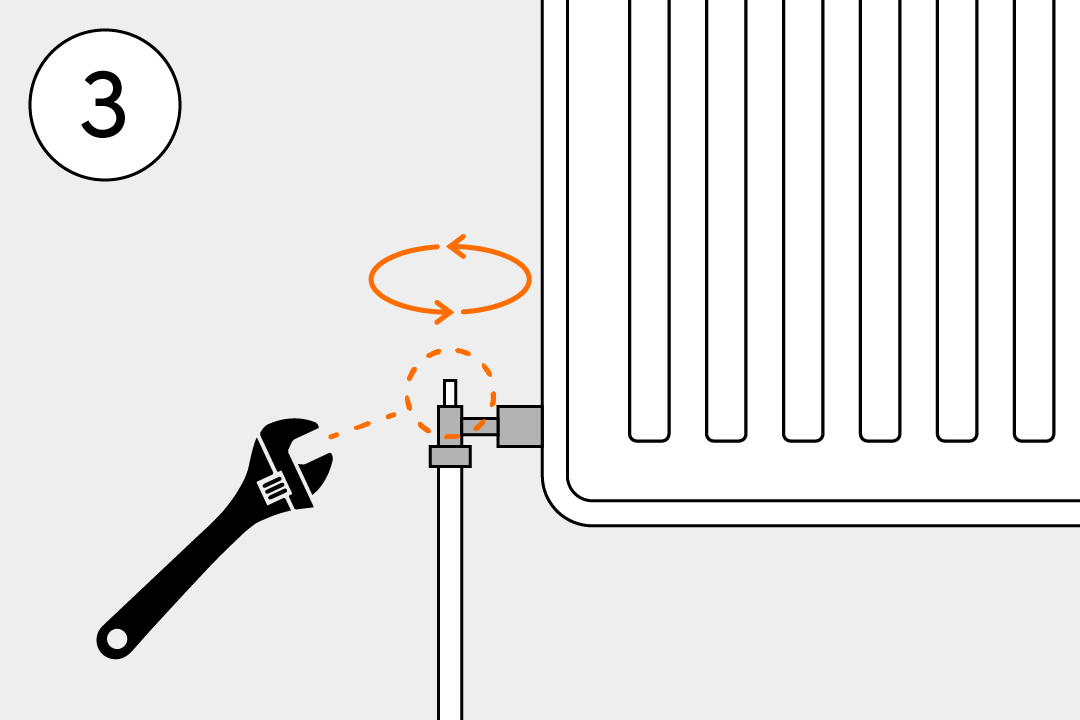
3. Partially open the lockshield valve
- To help relieve pressure and aid in draining the radiator, use an adjustable spanner to slightly open the lockshield valve by turning it anticlockwise.

4. Protect the area
- It's advisable to pull the carpet away from the radiator (if you have one) and protect the floor around the manual control valve with sheets or towels.
- Place a bowl beneath the manual control valve to prevent water from leaking onto the floor.
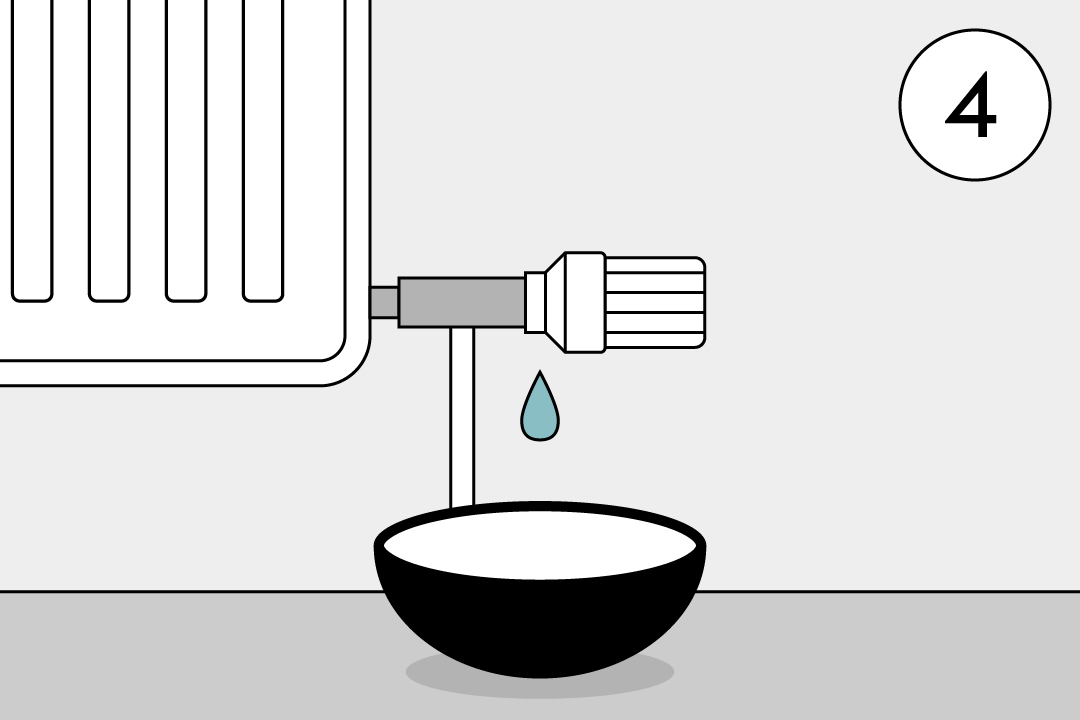

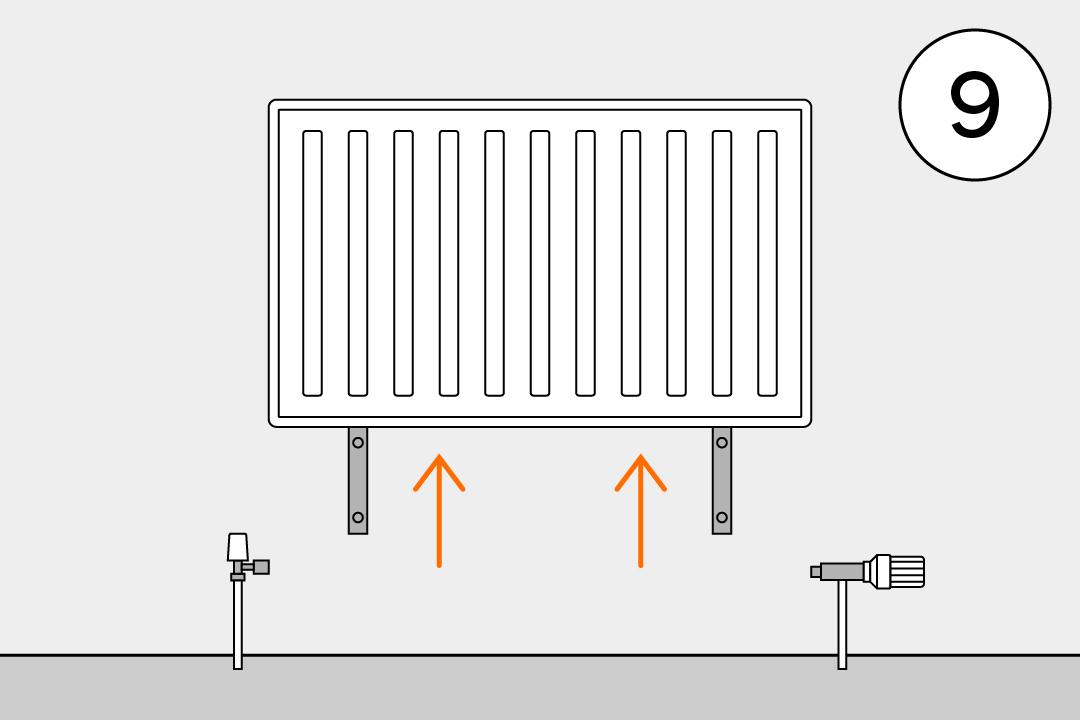
5. Loosen the bleed valve
- Use a radiator key to loosen the bleed valve at the top of the radiator.
- Be ready with the bowl as water escapes.
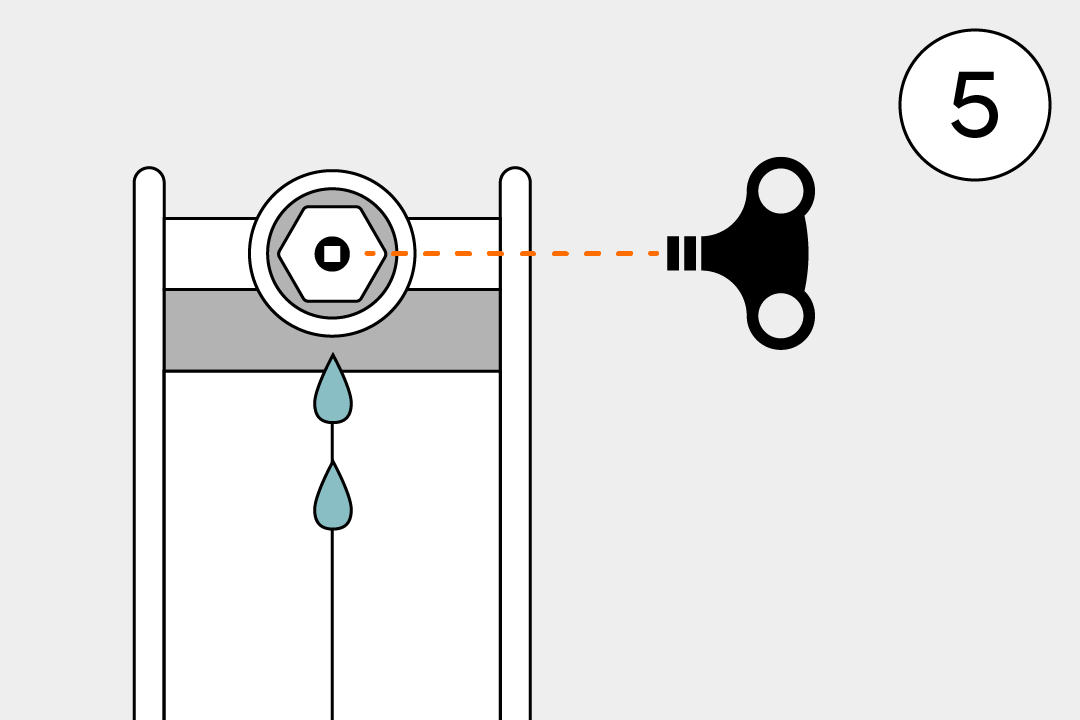

6. Loosen the cap nut
- Keep the adjustable spanner on the manual control valve to hold it steady.
- Use the other spanner to loosen the cap nut attaching the manual control valve to the radiator.
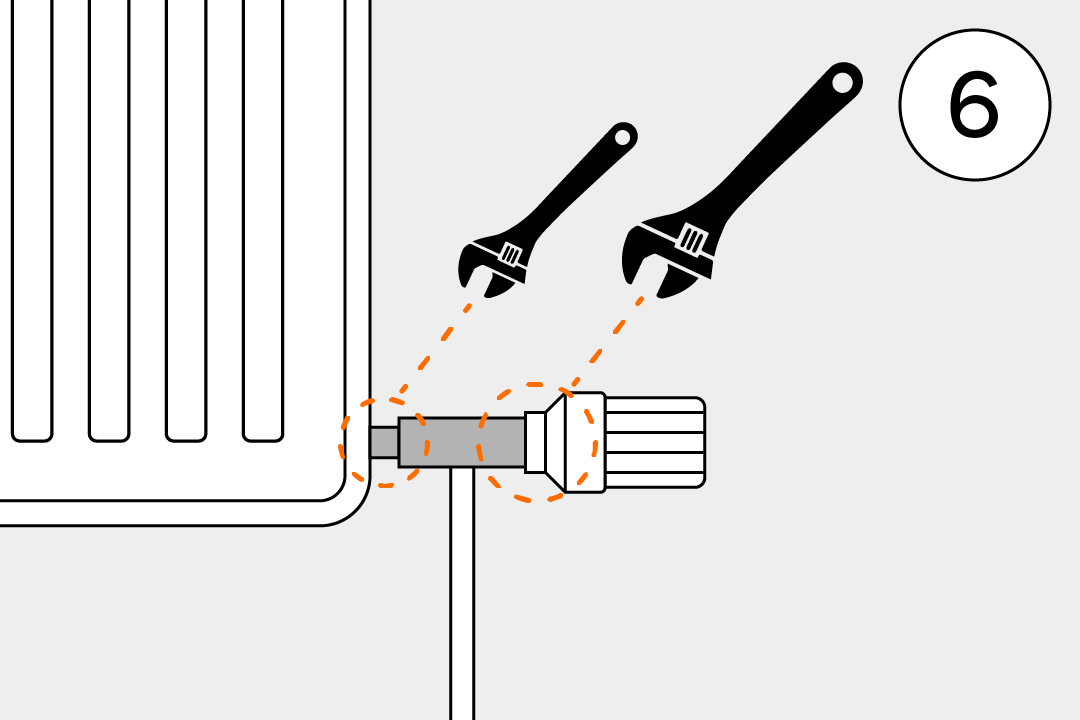

7. Catch the water
- Once your bowl is full, it's time to tighten the cap nut to stop the water from flowing while you empty it into the bucket.
- You will need to repeat this step several times until the water stops flowing.
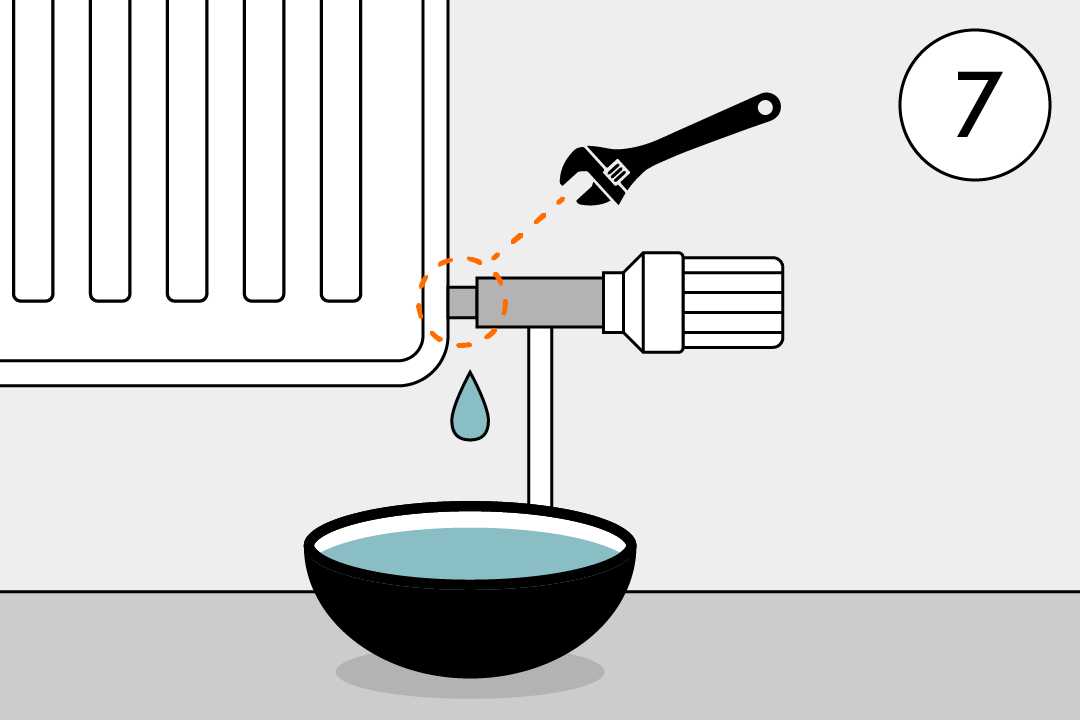

8. Loosen lockshield valve nut
- Using both spanners in the same way as before, undo the other cap nut that's holding the lockshield valve on to the radiator.
- Keep the bowl in place to catch any escaping water.
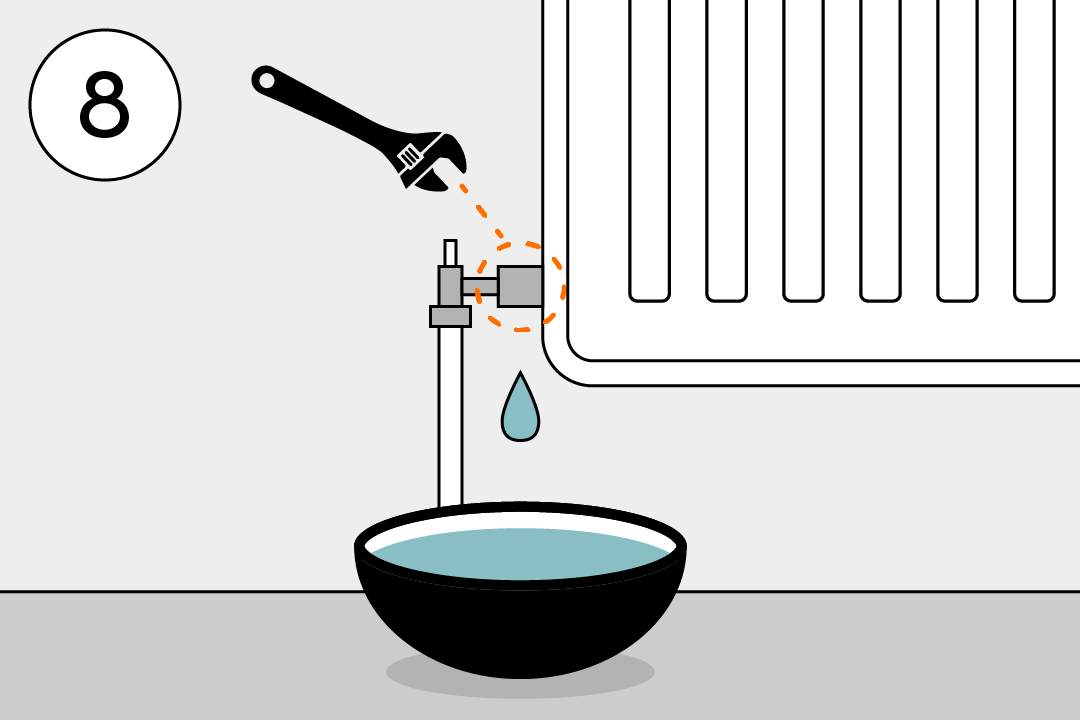

9. Remove the radiator
- Once the cap nut is fully loosened, carefully lift the radiator off its brackets or supports.
- Cap the exposed pipes with towels to prevent water leakage.
- Empty any remaining water into the bucket and dispose of it appropriately.

Putting the radiator back
After successfully removing your radiator for maintenance, repairs or decorating purposes, it’s time to put it back in its place. Remember, these steps may vary based on your specific setup – it’s always recommended to consult with a professional if you’re unsure:
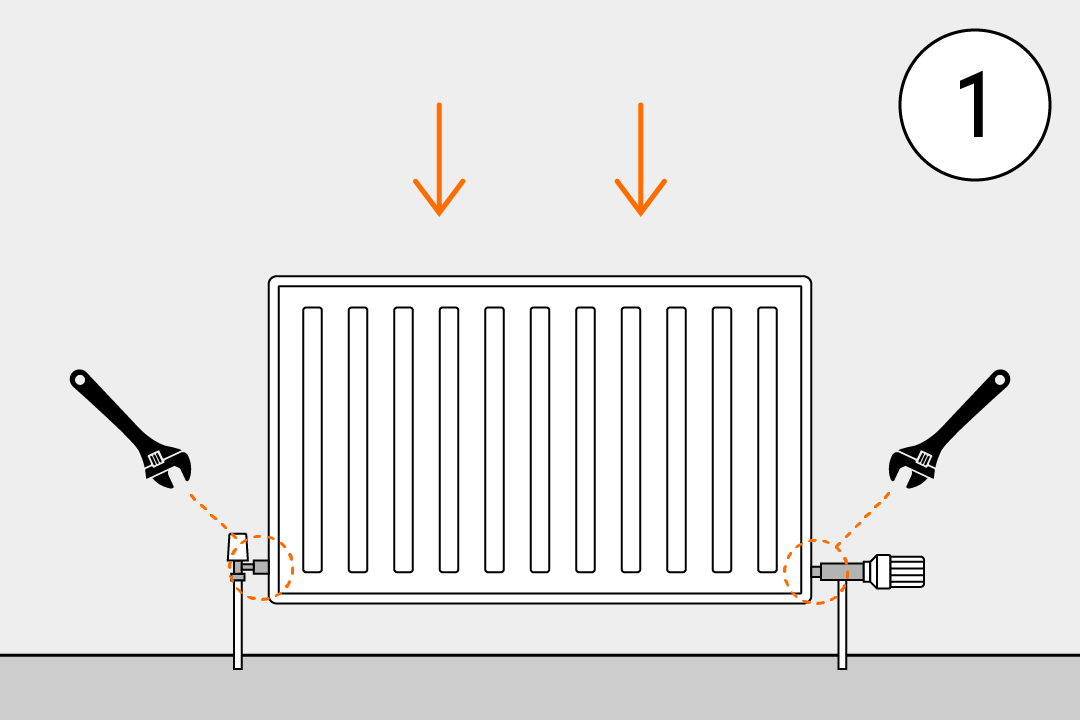
1. Reassemble the radiator and reconnect valve connection
- Reassemble the radiator by first putting it back on its support brackets.
- Make sure that the valves line up accurately with the radiator.
- Attach the valves to the radiator by tightening both cap nuts.

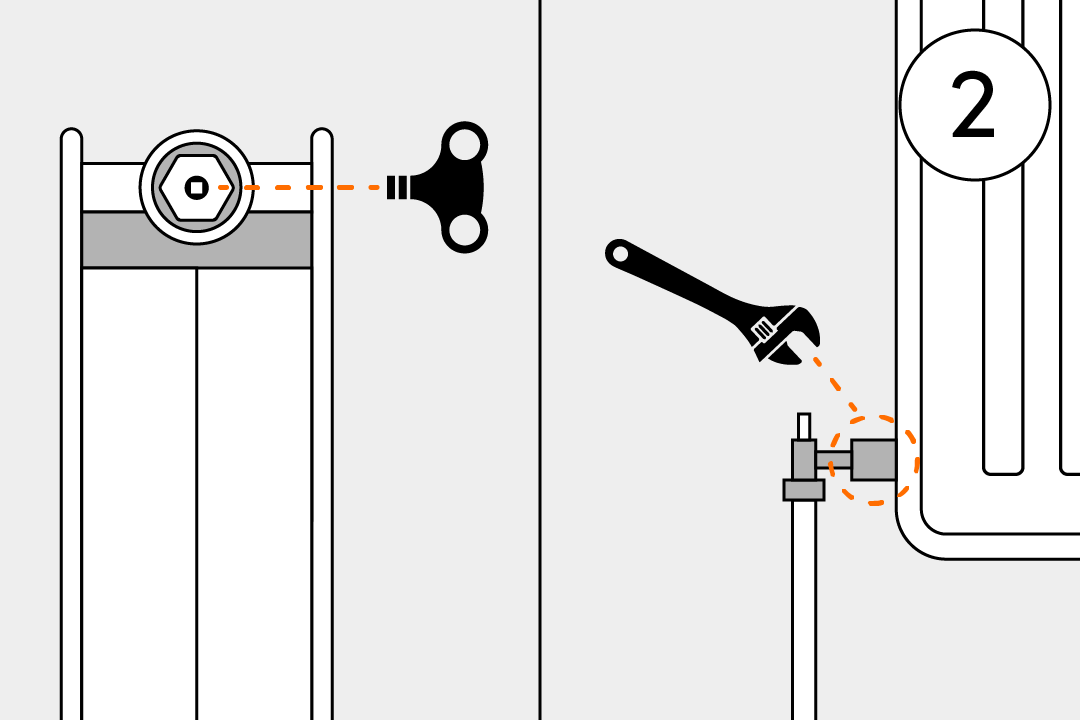
2. Close the bleed valve and lockshield valve
- Use the radiator key to fully close the bleed valve. This prevents air from entering the system when you start filling the radiator with water.
- Next, use the adjustable spanner to twist the lockshield valve spindle in an anticlockwise direction.

3. Open the manual control valve
- Turn the manual control valve on the radiator anticlockwise. This will allow water to flow into the radiator.
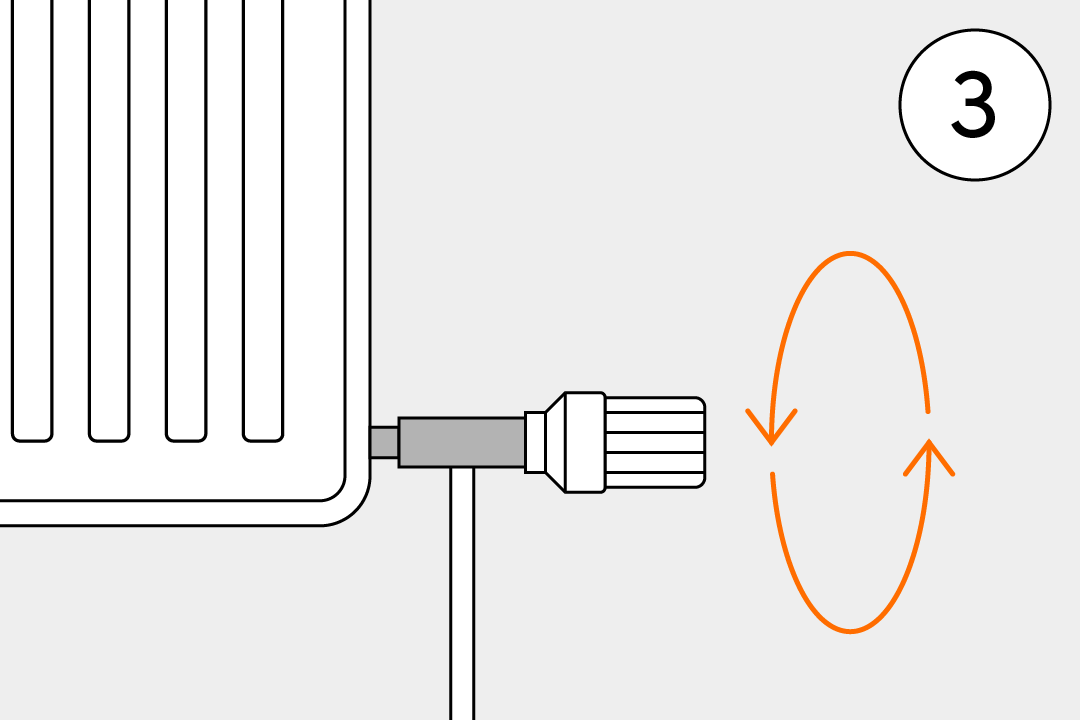

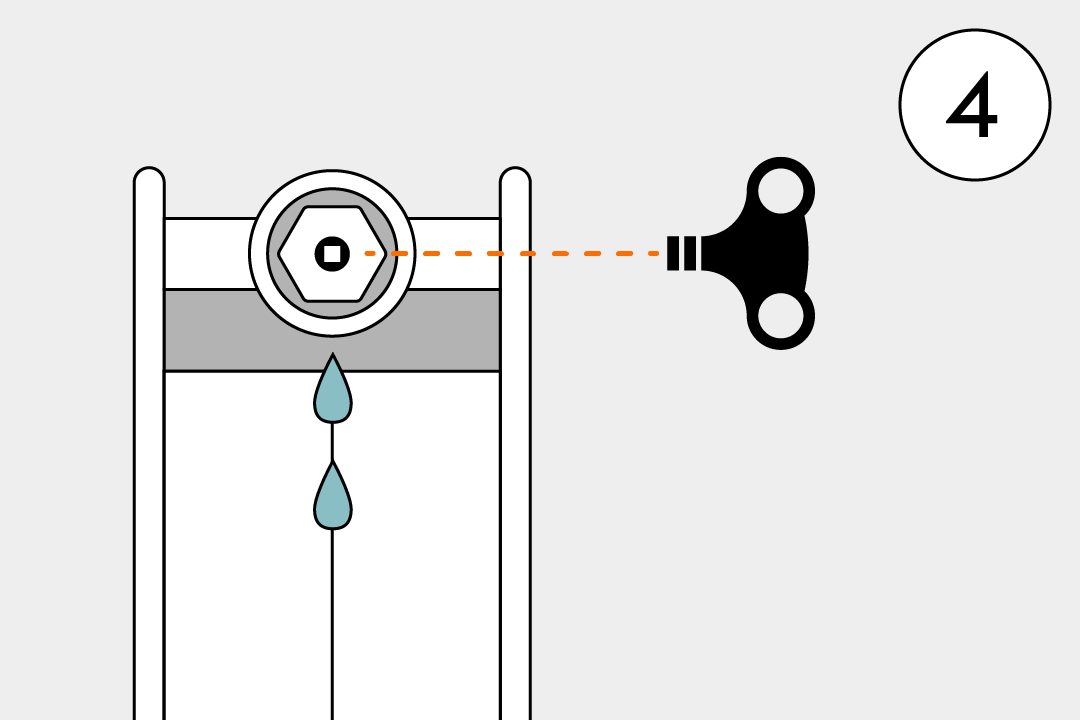
4. Bleed the radiator
- As the radiator starts filling up again, use the radiator key to gently open the bleed valve for a short moment. This will release any trapped air from the radiator.
- Close the bleed valve once water starts flowing steadily from it.
- Monitor the radiator’s temperature to ensure it’s working correctly. If it’s heating up as expected, you’ve successfully got your radiator up and running again!

Replacing with wall mounted electric radiators
Plan on upgrading your old radiator with an electric model? Now that you’ve successfully removed it, take care of disposal, re-decorate as necessary, then crack on with fixing your new electric radiator to the wall.
Hardwired or DIY installation?
One of our most frequently asked questions is whether our electric radiators should be installed DIY-style or hardwired by an electrician. The answer is simple, and it depends on the following factors:
|
Hardwired installation
|
DIY installation
|
| You’re installing multiple electric radiators throughout the property | You’re installing one or two electric radiators |
| It’s an oil-filled radiator | It’s an oil-free / ceramic electric radiator |
| You’re installing in a bathroom | You prefer the freedom of being able to remove it easily and mount elsewhere |
| You want a fully integrated appliance | You want the option of making your electric radiator freestanding |
While hardwiring is always recommended for a full refit, if you have just one radiator, DIY installation is the perfect choice. It’s free, quick, easy, and doesn’t require any extras!
Best practise for installing a wall-mounted electric radiator
Whether a DIY prodigy or humble beginner, we’ve made it as easy as possible to successfully fit our DIY-install electric radiators. While each heater is different, you can typically expect to find a drilling template, wall brackets, and the relevant screws and wall plugs required for a quick setup. You’ll also receive a user manual with illustrated, step-by-step instructions to make the process even easier.
Our flagship radiator, the Ecostrad iQ Ceramic, can be installed following just three simple steps:
-
Step 1: Position the template on the part of the wall where you’d like the radiator to be fitted. Drill a place for your wall plugs.
-
Step 2: Insert the plugs accordingly and fit the brackets on the wall.
-
Step 3: Hook the radiator onto the brackets before firmly tightening the safety screws on top.
Watch our video guide on installing electric radiators, answering your frequently asked questions as we go.
Stay tuned for more expert heating guidance
Our heating consultants are committed to keeping you informed on the latest hints, tips, and how-to guides on all things electric heating. Stay up to date with our latest insights or get in touch with our team of advisors if you have further questions. In the meantime, browse our full range of wall mounted electric radiators to find the perfect fit for your space today!
Key learnings
✓ Removing a central heating radiator can be done yourself – you’ll just the need the help of a few household items.
✓ Once you’ve removed the radiator following our simple nine-step guide, you can easily put it back once you’ve finished painting and redecorating.
✓ If you’re planning on replacing it with an electric radiator, keep in mind if hardwiring or DIY installation is the best choice for you.
✓ DIY installing an electric radiator is quick, easy, and requires no costly extras. All our DIY-install heaters come with all relevant fixtures and fittings and a straightforward user manual.
Related Articles


Catriona Elliott
As Senior Content Writer at Electric Radiators Direct, Catriona’s articles are a treasure trove of information – meticulously researched and brimming with style to keep you in the loop on all things electric heating.


